Thursday, August 14, 2014
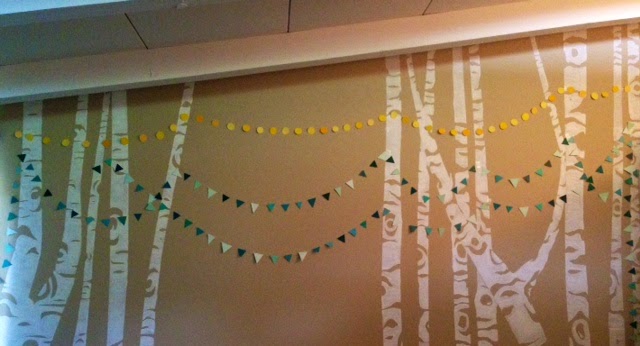
Birch Tree Forest Wall Art
DIY Birch Tree Wall!
This was such a fun DIY! Having had all the materials from previous projects,
this whole project was FREE! Doesn't get better than that.
Materials:
1.) White Paint/Primer
2.) 2 Paintbrushes (1 Medium, 1 Small)
3.) Blue Painters Tape
4.) Step Stool, or Ladder if you're short like me.
5.) Pencil
I wont lie to you, this takes awhile, but it is well worth it!
Step 1: Sketch! Never go into a project like this blind. Its always best to get your perspective right on paper first before you begin.
(My First Tape Attempt) (Final Tape Design)
Step 2: Tape! This is the hardest part of the entire thing! Make sure you step back and look at your work as you go. I moved trees around for a full day before I was happy with a design. If you are planning on putting furniture in front of your wall, I suggest marking their locations so you can plan your trees around them.
Step 3: Paint! Find a reference and go nuts! I attempted to draw a design on the first tree, but found it was much harder to cover or remove lines once I started painting. I just went for it! Let me first tell you that I have my Bachelors in Illustration so I'm obligated to be good at this stuff, but please don't try this if you aren't feeling confident. Draw light designs and everything will be just fine. I also starting pulling away tape early to get a better feel for the width of the trees, but thats up to you.
Step 4: Clean up! Remove the the blue tape, ( if you haven't removed it already) and use your small brush to touch up blurred lines. If you over lapped your trees, you'll also have to connect limbs where tape ran between them. This takes time and patience, so clear a couple hours and crank some music.
Tadaa! 4 Steps and a few days! This just made my room so cozy and whimsical. I just love looking for faces in the trees, and their glow from the TV at night. I used paint swatch samples to make banners of lights and flags to decorate the wall and plan on adding an owl off a branch. This project is great for any room and any age. Enjoy!
Tuesday, July 22, 2014
Table Makeover
The Best Furniture is FREE Furniture!
My Father-in-law is fabulous at finding treasures on the side of the road,
and for that my house is thankful. His latest find was this wonderful utility table on wheels. Of course I just had to do a little tweaking, so here are my quick steps!
and for that my house is thankful. His latest find was this wonderful utility table on wheels. Of course I just had to do a little tweaking, so here are my quick steps!
Step 2: Read the directions on the back of the can and spray away!
I like to work in a circle when spraying large objects. This was you can see your work in different lights and find missed areas. It's up to you if you want to paint the underside of the table.I like to go with the theory, 'out of sight, out of mind.'
(Make sure the newspaper does blow up and scratch your legs)
Side Note: Wear gloves.
I think the picture says it all on this one.
(If you don't have gloves, use a plastic baggie)
Tadaa!! Pop those wheels on and roll away!
With the heat of the summer, it took my table much longer to dry.
Be sure your table is completely dry before bringing it inside.
I love this table!
I can use it almost anywhere in the house!
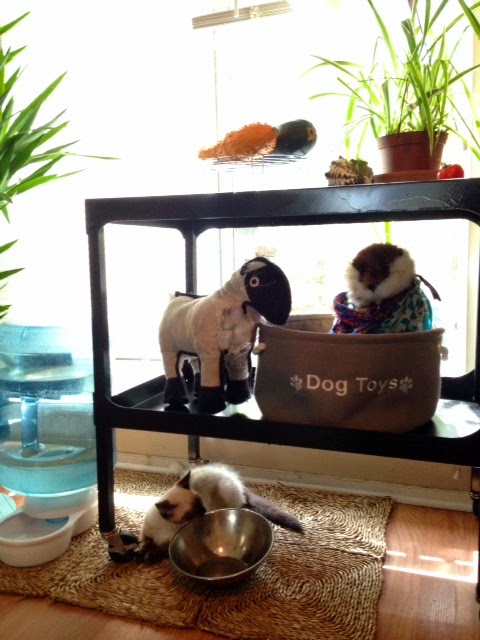
For now It's hanging out with the puppies toys, but I'm bound to move it again!
Even the kitten loves it! Enjoy!
Easy Upgrade!
Tuesday, July 15, 2014
Hanging A Finished Puzzle
Puzzles can be a lot of work,
so why take them apart when you're done?
In only a few steps, you can turn your finished puzzle into hangable artwork.
Wednesday, July 9, 2014
Every Artist Needs An Inspiration Wall
Here's a little peak at my Inspiration Wall. It was once just a few nails and fishing wire, but now is filled with an array of items. Some are finished projects that I'm still adoring, but most of them are unfinished and screaming for attention. I've added pictures, ribbons, aprons, puzzles and even some drying flowers. It doesn't matter what you add, as long as it continuously inspires you to keep creating!
Wall Decor
Hanging Pictures Doesn't Have to Be Scary!
 |
| A Marine Corps Tribute Wall |
3 Easy Tricks I Learned Along The Way!
1.) Move things
around! Lay your frames out on the ground before you start
to hang. Some people may suggest tracing your frames on paper and using them as
templates to move your design around. I think its better to use the actual
objects you will be hanging, as some colors may look better next to others and
so on.
2.)
Grab a pencil
and a ruler! Make sure to measure the locations of each hinge on all of the frames.
This may not be the best idea, but go ahead and draw right on the wall! As long
as your walls aren’t white and you draw lightly, your marks should erase off
easily. Besides, it’s better than putting extra holes in the wall.
3.) Learn to love
your level! Make sure your level is out for this entire project. There is
nothing worse than stepping back to see your entire masterpiece is crooked.
Tuesday, July 1, 2014
Painted Frames
Fun Frame Designs
Why let broken frames go to waste when you can transform them into this!
The hardest part about painting a picture frame, is deciding what to paint on it! This frame already had a layer of white paint on it from a previous project, but for you, I suggest putting a layer of gesso or primer on it first to provide adhesive for your paint. Once you've found your idea, do a light sketch on your frame. It will be harder to remove or hide dark pencil marks once you've started painting, so stay as light as you can. I struggle with this, so to correct myself, I gently erase my lines before I paint them so I can just barely see the sketch, and this way it doesn't show through light paint colors. My paint of choice for this project was Acrylic, because it dries fast and is an easy clean-up. Remember to paint the inside and side of you frame if you decide to fill your entire frame with design. Other than that, have fun! Take your time, and remember...
"we don't make mistakes, just happy little accidents." Bob Ross
Thursday, June 26, 2014
Quick Lamp Makeover
Say Goodbye to Gold!
 |
I've been staring at this lamp since the first day I moved in with my boyfriend...almost two years ago. The shade is too big and the gold and I are just not getting along. Even though it has now found its new and permanent home in our guest room, that doesn't mean it still doesn't deserve an update! Besides, it's an excuse for another DIY project, so why not? |
 |
| Step 2: When you've finished at the top, tape around the bottom. Again, you may find this step unnecessary. |
 |
| Step: 4 Add tape where its needed until everything is safely covered and secured. |
 |
| Step: 5 Don't forget these guys! You can choose to cover the entire area, however since i really dislike gold, I covered the bare minimum. |
 |
| Step 6: Use a sandwich bag to secure the plug. Make sure your cord is pulled all the way out of the lamp before taping the bag on in case you missed an inch or two of cord. |
 |
| Step 7: Find a safe location and something to rest your lamp on. (Please try and ignore my dying grass.. we are in a drought you know.) I had leftover Rust-Oleum Painters Touch Spray Paint (http://www.rustoleum.com/) that i used for this project. I love this stuff because it dries quick and covers almost any surface. |
TADAA!
 |
Easy as that. We'll save the Shade Makeover for another day. |
Wednesday, June 25, 2014
Subscribe to:
Posts (Atom)


